Beansandyoga

Practical, healthful eating and living.

Mix-ins for Oatmeal November 29, 2013

People tend to think oatmeal is a lot of trouble, but it can be made in big batches. Simply store your cooked oatmeal in the fridge and in the morning, scoop a serving into a bowl, top with milk, and heat it in the microwave.

Screen shot 2013-11-23 at 8.14.01 PMEven better, you can add your favorite toppings on the day you make the big batch, thus saving even more time in the morning. I prefer steel-cut oatmeal.

Here are some of my favorite mix-ins:

  • Cocoa nibs
  • Banana slices
  • Dehydrated strawberries (from Trader Joe’s)
  • Brown sugar
  • Honey
  • Ground flax seed
  • Grated or chopped fresh apple
  • Fresh or frozen blueberries, raspberries or blackberries. If you add them while the oatmeal is still hot, they’ll steam and cook a little, which helps them last longer.
  • Chopped dried apricots, blueberries or any dried fruit
  • Walnuts, pecans, ground almonds. Sometimes I even use pistachios!

How to make a batch of steel-cut oatmeal:

1 cup steel-cut oats

2 1/2 cups of water

dash of salt

I like to rinse my oatmeal before cooking it. I’m a gluten-free person, and this way any dust from other grains gets washed away. (Note, I am VERY diligent about the rinsing. I put the dry cup of oats in a deep bowl, cover with cold water and swish it around, then slowly pour the water out. The oats are heavy enough so that they don’t fall out of the bowl if you empty the water out gently. I repeat this about 20 times in order to feel confident that any gluten contaminants have been washed away. If you’re not concerned about gluten, maybe rinse the oats 2-3 times just to wash away dust.)

Put the oats, water and dash of salt into a heavy pot. Cover and bring to a boil. Once the water boils, turn down the heat and simmer for about 40-60 minutes. Sometimes I just turn off the heat after about 20 minutes, keep the pot covered, and let the pot sit until all the water has been absorbed.

Option 2: Use a rice cooker! So easy and the clean-up is easier, too. (Follow your rice cooker’s instructions.)


Life Progress: Nutrition, Kohlrabi, Gluten Free Body November 8, 2013

KohlrabiI tried a new food today; kohlrabi. It was amazing. First, I sliced a tray full and roasted thin slices of kohlrabi in olive oil. But I still had a lot left. So then I made a cream of kohlrabi soup. Amazing.

Two things led up to this adventure.

The first is that I enrolled in a college nutrition course. This is THE best investment I have ever made in my health. After twenty-plus years of blank stares from doctors when I was first struggling with the symptoms of gluten sensitivity, not knowing the cause, and then another five years of blank stares after letting doctors know that I can’t handle gluten, I have made life-changing breakthroughs that solve a lot of mysteries.

Vitamin A for eyes? You need to eat things like carrots and butternut or acorn squash with a little fat, or else your body can’t absorb it. Noticed your eyesight deteriorating lately? You might want to try having a few extra carrots w/ olive-oil based salad dressing, or squash with a pat of butter on top.

One key variable I learned about is that if your body isn’t handling gluten, then the mechanisms that absorb all the other nutrients are essentially blocked, shut down, wilted, rendered useless with regard to absorbing other nutrients.

Had a few bloody noses lately? When you get a paper cut do you spout like a fountain? Vitamin K is essential to helping blood clot. It’s so essential that newborns get a shot of vitamin K right away when they’re born. If they didn’t get it, and got a minor cut, they could bleed to death. Go ahead, check it out.
That’s what my college nutrition book says, and I believe it. Why? Because unstoppable flowing blood has been around in my world for quite a while.

None of these things ever get connected when I talk to doctors. If there’s anything I’ve learned, it’s to be your own detective, and take charge of your own health.

So kohlrabi. The other motive behind kohlrabi is that I hear Lynn Rosetto Casper recommend it on a radio show this week. She gave some tips on how to use it: mashed with butter like potatoes, roasted, or in a cream based soup.

Finally, in my nutrition class, I learned that variety is key. I’m inclined to fall into ruts. I’ll eat the same thing everyday for months before I get sick of it. But my nutrition class encourages variety. Not just seasonally, but daily, too.

So I’ve started branching out. I’ve started taking risks. I’ve started bringing home one new fruit or vegetable from the store each week.

Since I’ve begun, I’ve discovered blackstrap molasses for calcium, cocoa nibs for antioxidants, increased my fish and flaxseed for omega-3s, and gone on a few adventures.

CREAM OF KOHLRABI SOUP

1 cup chopped onion
1-2 stalks of chopped celery
1 kohlrabi root, peeled and chopped into 1-2 inch chunks
2-3 tablespoons butter*
4 cups broth of your choice
1/4 cup corn starch
milk
salt and pepper to taste

Instructions
Melt a little butter in a soup pot. (Butter is making a comeback, it’s not as bad for you as was once thought.)

Saute the onion and celery for a few minutes.
Add the cornstarch and stir to make a roux. ( A pasty sort of mix of the butter and cornstarch. Cornstarch is gluten free. Most traditional recipes use wheat flour.)

Add the kohlrabi chunks. Cover and cook for about 5 minutes.

Add the broth and stir well to mix the broth with the butter/corn starch mixture.

Cover and heat until boiling. Turn down the heat and simmer for about 25 minutes.

Remove from heat and blend with an immersion blender, or in a regular blender. Please be careful with the hot liquids! You can let the soup cool a bit. It won’t hurt.

Once blended, return to the stove and add about 1-2 cups of milk or cream. (Remember, fat helps your body absorb the great nutrients in kohlrabi, which is a good source of Vitamin A. (That’s good for your eyesight!)

Heat until warm, but do not boil. Boiling ruins a cream-based soup, so I’m told by the “Joy of Cooking.”

Taste for seasonings. Maybe top with a little freshly ground pepper. Garnish with chopped green onion or parsely, if you like.

Hint: When you bring home fresh herbs, green onion or bunches of parsley, chop it all up right away and store it in a covered container in the fridge. It’s SO handy for adding to eggs, sauces, pizza, salad, you name it. Just do it. You’ll be glad.

*Butter — a lot of chefs will say that when making a milk based dish, butter enhances the flavor better than other options like olive oil. Suit yourself, but butter is making a comeback. It’s also a source of Vitamin D. Finally, stop and consider whether you feel full and more satisfied (thus eating less) when you eat something with a little normal, natural fat in it. I know I do.

That’s it!


Gluten free chocolate almond joy bars March 2, 2013

IMG_0578More than anything, I wanted a creative outlet today. One of my favorite things is to find a recipe for something I’ve never made before, get all the ingredients, then see how it turns out. Today’s new recipe is adapted  from one of my favorite gluten free blogs, Elana’s Pantry.

One thing I like about gluten free baked goods is that there’s usually a lot of protein in the mix. That means I’m full after one or two bites! An indulgence I can’t go overboard on because a few bites is all I want and need.

Note: this bar is not as sweet as a traditional cookie or candy bar. Feel free to add an extra teaspoon or two of sugar if you have a sweet tooth.

CHOCOLATE ALMOND JOY BARS (GLUTEN FREE)

  • 4 eggs
  • ¾ cup coconut milk (Coconut has healthy fats; I use regular instead of low fat. If you have any left over, it keeps well in either the fridge or freezer.)
  • 2 teaspoons almond extract
  • ¾ cup coconut sugar (or 1/2 cup regular sugar)
  • ½ cup blanched almond flour  (Trader Joe’s is a great source)
  • ½ cup coconut flour (Buy as much or as little as you like from the bulk flour bins at your local food coop.)
  • ¼ teaspoon salt
  • ½ teaspoon baking soda
  • ¼ cup unsweetened shredded coconut (might be hard to find in a traditional grocery store. Try Whole Foods or a food coop.)
  • ¾ cup chocolate chips
  1. In a large bowl, whisk together eggs, coconut milk, almond extract and sugar
  2. In a smaller bowl, combine almond flour, coconut flour, salt and baking soda
  3. Mix dry ingredients into wet with a handheld mixer
  4. Stir in ½ cup of the chocolate chips
  5. Grease an 8 x 8 inch baking dish
  6. Pour batter into dish, then sprinkle shredded coconut and remaining chocolate chips on top
  7. Bake at 350° for 30 minutes
  8. Cool for 1 hour
  9. Serve
 

Brave Any Chili Contest White Chicken Chili February 18, 2013

I fell in love with the San Francisco Chronicle’s cookbooks while visiting San Francisco nearly a decade ago. This recipe is from their 1997 edition with the yellow cover. In contrast with most of the recipes I post, this requires a bit of dedWhite Chiliication. It’s not that it’s particularly tricky. It’s more that there are a lot of steps, and you need a good, solid day to make it.

Fortunately, it’s a great diversion on a snowy day, and the reward of a steaming bowl when the day is done makes it worth while. It’s also a great recipe to make in big batches to keep in the freezer. In fact, I was thrilled to present a container as a gift to a friend last week. I simply grabbed one of the containers I’d kept in the freezer and off I went!

And for those of you with workplace chili contests, this is absolutely a contender. Whether it brings home a blue ribbon or not, you’ll be proud it was in the running, and your co-workers will thank you, too.

The ingredients that make this so special, in my mind, are the tomatillos, roasted Anaheim chiles, beer and rice vinegar. The rest are pretty common among chili recipes.. but with these additions the recipe turns from simple comfort food to gourmet fare.

White Chili

BEANS

1 pound dry Great Northern or navy beans

8 cups water

1/2 cup chopped onion

2 garlic cloves, minced

Pepper

1 teaspoon salt

CHILI

12 ounces Mexican beer (not dark) –I used a gluten free New Planet beer

2 cups diced onions

1 1/2 tablespoons minced garlic

1 cup diced red bell pepper

2 jalapeno chiles, seeded and diced*

4 Anaheim or New Mexico green chiles, roasted, peeled and seeded**

1 tablespoon dried oregano***

1 tablespoon crushed cumin seeds***

1 1/4 pounds skinned, boned chicken breasts (or the parts you like)

1 can (14 1/2 ounces) chicken broth

2 tablespoons ground New Mexico chile (or chili powder)

1 pound tomatillos, husks removed by soaking

1 cup minced fresh cilantro

1 tablespoon rice vinegar

1 teaspoon salt

2 cups grated sharp white cheddar cheese (or regular sharp cheddar cheese)

Cilantro leaves, for garnish

To make the beans, wash and pick over to ensure there aren’t any pebbles mixed in. (This rarely happens to me anymore but it doesn’t hurt to check.) Place in a large pot. Add the water, onion, garlic cloves and a grateing of black pepper. Simmer for 2-3 hours, until the beans are tender.  Add the salt during the last 30 minutes of cooking. (Adding salt too early can toughen the beans.)

To make the chili, While the beans are cooking, place the beer in a 4-quart pot.  Add the onions, garlic, bell pepper, jalapenos, green chiles, oregano and cumin.  Simmer for 10 minutes.

Cut the chicken into strips, then dice.  Add to the pot along with the chicken broth.  Sprinkle in the ground chile and simmer for 15 minutes. (Alternatively, you can add chicken thighs and drumsticks on the bone to the broth, cook, then simply remove the meat from the bones later.)

Place the tomatillos, minced cilantro, vinegar and salt in a food processor and process to a salsa consistency.  Stir into the chili.  Add the drained cooked beans and simmer for 20 minutes. Taste for seasoning: add salt, if desired.

Either sprinkle the cheese over the top of each bowl, or mix into the pot of chile until melted and blended. Garnish with cilantro.

*To handle the jalapeno chiles, use a small ziplock baggie as a glove to keep the hot oils off your skin. Otherwise, you can burn your fingers, and if your finger ends up near your eye, you could burn your eye.

**To roast and peel the Anaheim chiles, place on a cookie sheet under the broiler for about ten minutes per side. You may want to put a layer of aluminum foil on the sheet first, to help with cleanup.  Once the chiles are blackened on each side (yes, really go for black), carefully remove from the oven and drop into a large ziplock bag. Seal the bag and let them sit for about five minutes. This steams the chiles and makes it easier to peel off the skin.

Place the chiles onto a cutting board. Chop off the stem end, then slice from end to end. Prod open the chile and slide the seeds out with the dull side of your knife. Then peel the skin off with your fingers. (Anaheim chiles aren’t hot like jalapenos.)

Once the seeds and skins have been removed, dice and add to the chile.

***Spice flavorings are amplified and enriched by toasting briefly before adding to a recipe. Simply place a dry skillet (no oil) onto a lightly warmed burner. Measure your spices and sprinkle over the skillet. Allow to warm briefly without burning, just a minute or so depending on the heat of the skillet. Add to your recipe immediately.


Gluten-free chocolate chip scones February 2, 2013

choc chip scones

I am indebted to Elana Amsterdam, whose blog, Elana’s Pantry, has become my go-to source for easy, satisfying gluten-free recipes.

First of all, her recipes’ ingredient lists are usually short and simple. Whereas the typical gluten-free baked goods recipe from other sources requires multiple types of flour and expensive xanthan gum, Elana’s come out beautifully with usually one type of flour (often coconut or almond), mixed with a few eggs, shortening and natural sweeteners like honey or agave syrup.

It’s been the coldest week of the year in my wintry city. In need of a baked good for a potluck tomorrow, I pondered between two of Elana’s recipes. One was an almond-flour slightly sweet drop biscuit, the other was the recipe below for chocolate chip scones of coconut flour. Luckily, I had both types of flours on hand and had the luxury of deliberating. Since I hadn’t had a chance to try the chocolate chip scones yet, I succumbed to curiosity knowing that in case I didn’t like the way they turned out, I’d have a back up. Luckily, they were delicious and I am certain my potluck crew will love them! So easy that making a second batch was no trouble at all.

Note: The instructions reflect how I made these, which is slightly different than the instructions on Elana’s site.

Gluten-free Chocolate Chip Scones

  • ½ cup coconut flour
  • ¼ teaspoon sea salt
  • ¼ teaspoon baking soda
  • ¼ cup vegan shortening
  • ¼ cup honey
  • 4 large eggs
  • ½ cup (about 3 ounces) chocolate chips
    1. Combine coconut flour, salt and baking soda
    1. Mix in shortening, honey and eggs
    2. Fold in chocolate chips
    3. Scoop batter onto a parchment paper or silpat lined baking sheet
    4. Bake at 350° for 10-14 minutes
    5. Cool and serve
 

Where’ve I been? July 21, 2012

Filed under: What I'm eating now — beansandyoga @ 9:14 pm

New floors, new work assignments, challenge, and change have kept me distracted from blogging this past year. My apologies. Through it all I’ve honed in on what’s been making me sick all my life: gluten.  It’s inspired a comprehensive lifestyle change including a discipline of making my own lunches for work, something I never thought I’d accomplish on a regular basis.

I know, there’s a lot of skepticism over the recent uptick of gluten-free talk and products. But once I put it all together, it became clear that whenever the symptoms came back, upon re-evaluating what I’d eaten, the common denominator was gluten. Hiding in places like soy sauce, salad dressing, chicken broth at times, and other products, I’ve learned the hard way that I am overcome by sleep within about twenty minute of eating it.  It wipes me out, and it takes about 48 hours to completely recover.

Moving forward, my guiding principles continue to include simplicity, seasonal foods, and organics when possible.  Half the battle is in finding recipes for foods that I can make in bulk, freeze, and/or easily transport to work for lunch.

Lately, my staples have been:

  • Pre-washed lettuce by Earthbound Farm Organics (stays fresh about a week in its original container).
  • Rotisserie chicken from Whole Foods (I worry that chickens from other sources may have been injected with gluten-containing flavoring or moisturizers).
  • Nature’s Path Eco Pack gluten free cereals; a basic flake and raisin cereal.
  • Frozen berries
  • Plain organic yogurt (usually served over the frozen berries).
  • Watermelon
  • Home-made granita
  • Baby Bel mini-cheese, a convenient snack at work.
  • Nuts, dried fruit and chocolate; another convenient snack at work.
  • Corn chips
  • Shredded carrots (for salads)

Future posts to include favorite recipes, tips and will of course be focused on gluten-free eating.


Cool Breezes July 28, 2011

Hot, humid, shut the door, turn on the AC sweet July.  Here’s a bit of what I’m dipping into to stay cool!

Frozen Granitas

Pour juice, sweetened tea, or nearly any kind of beverage into a freezer-friendly container. I use Ziploc containers because I know they’ll keep me from spilling on the way in and out of the freezer.

After about an hour, take your granita out of the freezer and scrape the frozen sides down and stir into the middle.  Repeat after another 30 minutes to an hour a couple of times until there are flakes of ice throughout and you’re ready for cool, sweet refreshment.  Depending on the size of the container, allow 2-5 hours for freezing.

Alternatively, create a simply syrup of 1 cup sugar to 1 cup water by heating until the sugar is dissolved.  Add to taste to freshly squeezed lemon juice or other fruit juices. Freeze as above.

Home-made Popsicles   

Take the same as above and freeze in popsicle holders.  If you don’t have popsicle holders, freeze in paper cups covered with aluminum foil with a popsicle stick inserted through the middle.

Experiment with adding simply syrup to your juice, blended fruit, whole berries, kiwi slices, or your tea of choice to get the flavoring you like.  I don’t particularly like highly sweetened juices.  Lately, I’ve been going with 8 ounces of unsweetened coconut juice, mixed with the juice of one freshly-squeezed lime and chopped fresh mint, with but a tablespoon or so of simple syrup.  Restorative on a hot day after a bike ride.

Watermelon

Buy a big seedless watermelon. Chop into bite-sized pieces. Store what you can in a refrigerator-friendly container. Freeze the rest on a flat tray lined with saran wrap and covered with saran wrap. Once frozen, store in a Ziploc bag, then blend, frozen, to create an instant watermelon slushie.

Cucumber slices in water    

Peel and slice fresh cucumber. Drop slices into a pitcher. Fill with fresh, cold water. Refrigerate.

Get creative: sometimes I add slices of lime or sprigs of mint. Go with what calls you.

Pickles

I don’t know why. Something about the saltiness, the coolness of the refrigerated jar, makes me crave pickles in summer.  I keep a jar in the fridge all throughout the summer.


Homemade Granola Bars April 11, 2011

Filed under: Easy food prep,Energy,Recipes,What I'm eating now — beansandyoga @ 2:12 pm
Tags: , , , ,

I’ve always been intimidated by recipes for homemade granola bars.  I was suspicious that they’d turn out hard.  Sometimes they called for ingredients I don’t like.  But the recipe below seems just right.  It’s flexible.  Any type of dried fruit or nut will do.  It’s easy to halve the recipe, or double it, if you like.  I admit my bars did not cut into perfect squares, but I was not deterred.  They crumbled a bit, but were moist and chewy.  It’s delightful on its own, or sprinkled over fresh fruit and plain yogurt

HOMEMADE GRANOLA BARS

    • 2 cups quick rolled oats
    • 1/2 cup packed light brown sugar
    • 1/4 cup almond flour or wheat germ
    • 1/2 teaspoon salt
    • 1/2 teaspoon ground cinnamon
    • 1 cup dried cranberries
    • 1 cup dried apricots, chopped
    • 1 cup nuts (walnuts, pecans, peanuts, sunflower seeds)
    • 1 teaspoon vanilla extract
    • 1/4 cup honey
    • 2 tablespoons maple syrup
    • 2 tablespoons vegetable oil

Directions

Preheat the oven to 350 F. Line a 9″ x 13″ pan with wax or parchment paper. Stir together the oats, brown sugar, almond flour, dried cranberries, apricots, nuts, salt, and cinnamon in large bowl, being sure to break up any clumps of sugar or dried fruit. Set aside.

In a smaller bowl, mix the honey, maple syrup, oil, and vanilla. Pour over the dry ingredients and mix well.

Pour the mixture into the prepared baking dish and bake for 30 minutes, or until the edges turn golden brown.

Remove from the oven and lift the wax or parchment paper from the pan. Let the granola slab cool for 5 minutes before removing the paper and cutting into bars.

Cool completely before eating or wrapping.

GLUTEN FREE: Be sure to buy oats from a plant that does not process wheat or other gluten containing products.  Do not use wheat germ.

Thank you to KitchenDaily.com for sharing this! (The above version is a slight modification of theirs.) http://www.kitchendaily.com/recipe/granola-bars-150114/#ixzz1JFKSXP2i
 

February Favorites January 28, 2011

Salt on the roads.  Salty stews. I can’t take it anymore! By the looks of the searches bringing readers here, it seems I am not alone.

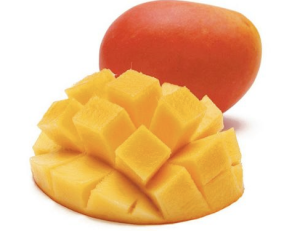
This week, my favorite foods were fresh avocado, fresh ruby-red grapefruit, and frozen mango chucks from Trader Joe’s.

Sweet relief.  They are restoring.  The avocado I ate straight out of the shell, although it would be perfect on a salad of Romaine lettuce, grapefruit sections, red onion, feta cheese and balsamic dressing.  To the grapefruit I added honey and warmed it in the microwave for about 15 seconds.  Alternately, you could put it under the broiler for 3-5 minutes.

The mango? Heavenly.  Briefly thawed with the help of a microwave, then topped with plain, whole-fat yogurt, it made my day.  When fresh produce looks like it could be better, don’t hesitate to go with frozen.  The flash freezing techniques in use today keep berries, mangoes and vegetables nutrient rich.   They are a great shortcut when you want to maximize flavor yet get food without additives.


How to pack a salad for lunch August 21, 2010

Filed under: Easy food prep,What I'm eating now — beansandyoga @ 1:05 pm
Tags: , , , , , , , ,

I love a salad for lunch in the summer time.  It took some trial and error, but now my lunches get looks of envy.

“Is that Balsamic dressing? I’m going to make a salad just like that when I get home!” said a co-worker yesterday.

Make a salad well, and you’ll have the best lunch in the room.  Combine things too soon, however, and you’ll have nothing but green mush.

Here’s what I’ve learned.

1.  Pack the salad dressing separate from the salad.

2. Add the salad dressing immediately before eating.

3. Undressed salads, complete with meat, carrots, nuts, and other fruits and veggies will keep very well in a plastic container for about 24 hours.

4.  A few slices of roasted meat go a long way toward keeping me full and energized for the afternoon.

5. Dried cranberries or raisins add a snap, helping to round out the flavors.

6. Other typical ingredients I use: Romaine lettuce, sliced carrots, sliced apple, sliced raw zucchini, jicama, sugar pea pods, pears, raw unsalted nuts and crumbled goat cheese. (Avoid highly citrus or juicy fruits such as pineapple, as they may cause your lettuce to spoil.)

7.  I keep a salad spinner of washed, torn Romaine lettuce in my refrigerator.  When I’m ready to make a salad, I simply grab and go.

8.  I keep all the other ingredients together, as I rarely go through an entire apple or carrot for one lunch’s salad.

9. I prepare the UNDRESSED salad the night before.  Stored in a one-serving container, I keep it refrigerated until I leave for work the next day.

10.  By lunch time, the salad is still fresh and crisp.  Rather than bring a whole bottle of dressing to work, I bring one serving at a time in a small, plastic container.